Gear and Resources
-Photography equipment, adventure gear and online resources-
Everything you need to know to get outside and start creating
↓
From Cameras to Editing Software
Everything that you need to know to get started.
Tools, Gear, and Resources.
Gear and Resources:
I am a huge believer that the camera and the equipment that you use doesn’t necessarily make you a better photographer. But at the same time, without the proper equipment, gear, resources, and software, some things are simply impossible to achieve.
I don’t necessarily enjoy researching, testing, and reading reviews on equipment and gear, and you might be the same way. That’s why I decided to create a summary of everything that I use, so that you can know everything that you need to get started, without the trouble of doing a ton of research.
In the end, it’s time, effort, and vision that will help you create things that you’re proud of, whether they be a website or a compelling picture, but having the right resources behind you can only help you to get to where you want. Below is a list of everything that I use and everything that you need to know to get started.
Photography Gear:
Filters
My Recommendation: Break Through Photography
 I made a mistake when I was buying filters for my camera and I got the cheapest that I could. So, although I don’t currently use Break Through Filters, after a lot of research this will definitely be what I upgrade to next.
If I was starting my filter collection from scratch, I would pick up an X4 Polarizer, and three X4 neutral density filters (3, 6 and 9 stop). I would get them a size or two larger than my biggest lens so that I could still use them if I ever got a lens with a larger filter thread. The other benefit of having filters larger than the thread diameter of your lens is that you don’t have to worry about getting a hard vignette from the edge of the filters. Then I would get the step rings that I need to be able to use the same filters across all of my different lenses.
I also promise that when I finally get my hands on some of these filters I will post a review of them. And everyone knows that an internet promise can’t be broken!
Tripod
My Recommendation: Three Legged Thing
![]()
![]() For the longest time, I only had one of those tiny bendy tripods from GorrilaPod because I didn’t want to buy a full sized tripod. Can you believe it!?
For the longest time, I only had one of those tiny bendy tripods from GorrilaPod because I didn’t want to buy a full sized tripod. Can you believe it!?
A tripod is crucial for getting a lot of the pictures that I now find myself taking and it should be one of the first things that you look at getting. While they do cost a lot of money, you also don’t need the absolute best. I got a fairly cheap Giottos tripod when I was starting and I’m still using it. But, since buying it, I wouldn’t recommend it to even my worst enemy because it’s terrible, so instead I would recommend these options depending on your budget:
The Best of the Best: Really Right Stuff
Really Right Stuff makes some of the best tripods on the market, but they also cost a lot. If you’re willing to make the investment and want to make all of your friends jealous, then this is what to get.
More Affordable: Three Legged Thing
Three Legged Thing tripods are awesome and are what I would like to eventually upgrade to. They have a couple of different models but with a bit of research you can be sure to find one that will fit your needs.
Budget Option 1: Promaster
Promaster makes a solid tripod for a decent price (specifically the XC-522 tripod). I’ve never owned one myself but they look to be built well and have many of the features to look for in a tripod such as a lightweight, full height extension, good build quality, ball head, and small collapsible size. Sirui is another brand that I’ve never tried, but look to have good, affordable tipods.
Budget Option 2: Milano
If you have access to a London Drugs, then you can pick up a Milano tripod. As far as I know, they are sold exclusively through London Drugs, and although this might not be the first place that you would look for a tripod, they’re definitely worth looking at and are quite a bit cheaper than their competition. A tripod in this price range, however, won’t be perfect and I’ve heard some complaints about feet falling off (and having to be glued on to get them to stay) and the rubber grips on the legs slipping when you try to unlock and lock the legs, making it hard to tighten or loosen the legs. The price, however, might make these small things worth it for you.
As for tripod heads, I generally recommend that you get an arca swiss ball head rather than manfrotto, and then it works on the Peak Design clips easily that I recommend below as well!
Camera
My Recommendation: Sony Mirrorless Cameras
![]()
![]() While everything else on this page is somewhat optional, if you want to take any sort of picture, the first thing that you need is a camera. There are obviously tons of options out there and I’ve looked through many of them and weighed all of the options and I am very easily able to recommend the Sony mirrorless cameras.
While everything else on this page is somewhat optional, if you want to take any sort of picture, the first thing that you need is a camera. There are obviously tons of options out there and I’ve looked through many of them and weighed all of the options and I am very easily able to recommend the Sony mirrorless cameras.
Regardless of what camera you choose to use, however, you really just need something that allows you to get out there and take pictures that hopefully give you a good enough file to do what you want with them, whether it be to print, sell, or just share with friends.
The reason that I recommend the Sony mirrorless cameras is because they are small, lightweight, easy to use, and produce an unbelievably sharp image with tons of dynamic range.
Currently, I am using a Sony a6000, and before that, a Sony NEX 6. The Sony a6300 is even better and the new a6500 better still. If you’re able to take it one step further, and want the absolute best, then I recommend that you look at Sony’s full-frame line-up with the a7rII and a7sII.
I won’t get into why I think that mirrorless is the way of the future and why I recommend them over a DSLR on this page, but the guys on the Alpha Mirrorless Podcast do a great job of summarizing some of these ideas in the DSLR vs Mirrorless Episode of their show.
A6000:
This is the camera that I use, but it has since been discontinued. If you’re still able to find one, however, it’s a great camera. Although I wish that it was weather-proofed. The good news, however, is that the newer a6300 is.![]()
A6300 (or the new a6500):
This is a cropped sensor camera and is my recommendation whether you are just getting started, or have been into photography for a while and are looking to get a mirrorless camera. It’s weather sealed, has everything that you need and takes fantastic photos.
![]()
A7rII:
This is my “one day” camera. It’s packed full of pixels and takes photos sharp enough to cut your retinas. It’s a full frame mirrorless and is meant mostly for landscape type photography. With around a 42 megapixel sensor, this camera packs a ton of information into the photo files so that you never have to worry about being short on room to play with your files in post production.
A7sII
![]() Ths is another of my “one day” cameras. It’s a bit more specialized than the a7rII as it has 12megapixels on a full frame sensor. This means that each pixel is much larger than the a7rII so it can gather an immense amount of light which reduces noise in low light. It’s therefore a camera that can nearly see in the dark and take fantastic photos at very high ISO’s with minimal noise. It’s great for night photography or anything where the light is low.
Ths is another of my “one day” cameras. It’s a bit more specialized than the a7rII as it has 12megapixels on a full frame sensor. This means that each pixel is much larger than the a7rII so it can gather an immense amount of light which reduces noise in low light. It’s therefore a camera that can nearly see in the dark and take fantastic photos at very high ISO’s with minimal noise. It’s great for night photography or anything where the light is low.
Lenses
![]() A lot of people say that having good lenses is more important than even the camera itself. I completely agree, except that good lenses are often times significantly more money than the camera itself. Therefore, my lens collection isn’t anything to admire but it works for me at the moment and below is what I am currently using.
A lot of people say that having good lenses is more important than even the camera itself. I completely agree, except that good lenses are often times significantly more money than the camera itself. Therefore, my lens collection isn’t anything to admire but it works for me at the moment and below is what I am currently using.
I should also mention that I don’t spend much time “pixel-peeping” and looking a lens evaluations and things like that. Instead, if the lens allows me to take photos that I am happy with and captures the scenes from the places that I go with the detail, sharpness, and contrast like I remember when I was there, then I am happy to use the lens. It’s as simple as that.
Sony SEL10-18mm f/4:
![]()
![]() This is my absolute favorite lens and what seems to hog all of the field time on my camera. It’s also my most expensive lens, but to me it was more than worth it. I love the perspective that you can get with a wide angle lens and the creative things that you can do at these focal lengths. The lens also performs very well and has great sharpness and contrast throughout.
This is my absolute favorite lens and what seems to hog all of the field time on my camera. It’s also my most expensive lens, but to me it was more than worth it. I love the perspective that you can get with a wide angle lens and the creative things that you can do at these focal lengths. The lens also performs very well and has great sharpness and contrast throughout.
SEL 50mm f/1.8:
![]()
![]() I don’t use this lens a ton, but it is great to have a fast lens when you need one. It is extremely sharp, however, and it’s great for those mid-range shots, or for stitching together landscape shots as well. The 50mm focal length (or 75mm full-frame equivalent) is also great for portrait shots and the large aperture of f/1.8 lets you get the smooth bokeh background that looks so great.
I don’t use this lens a ton, but it is great to have a fast lens when you need one. It is extremely sharp, however, and it’s great for those mid-range shots, or for stitching together landscape shots as well. The 50mm focal length (or 75mm full-frame equivalent) is also great for portrait shots and the large aperture of f/1.8 lets you get the smooth bokeh background that looks so great.
Sony 55-210mm (f/4.5 – f/6.3):
![]()
![]() This is my telephoto lens and comes as a kit lens with some of the Sony cameras. Unfortunately, I don’t find that it’s a great lens and it lacks sharpness as well as contrast. I have taken pictures with it that I’ve been happy with in the past, but in general I try to avoid using it and it’s one lens in my collection that I would like to replace.
This is my telephoto lens and comes as a kit lens with some of the Sony cameras. Unfortunately, I don’t find that it’s a great lens and it lacks sharpness as well as contrast. I have taken pictures with it that I’ve been happy with in the past, but in general I try to avoid using it and it’s one lens in my collection that I would like to replace.
Sony 16-50mm :
![]()
![]() This is the other kit lens that comes with the Sony cameras. Again, it’s not the sharpest lens, but it is quite usable and it covers a fairly important focal range that seem to use quite often. The best thing about this lens is its size. It’s called a pancake lens because it is so flat and compact which makes it great when you are travelling or hiking as you can almost fit it into your pocket.
This is the other kit lens that comes with the Sony cameras. Again, it’s not the sharpest lens, but it is quite usable and it covers a fairly important focal range that seem to use quite often. The best thing about this lens is its size. It’s called a pancake lens because it is so flat and compact which makes it great when you are travelling or hiking as you can almost fit it into your pocket.
Sigma 30mm:
![]() This is my other prime lens that lets me take sharper photos in that “normal” focal length on a cropped sensor camera. Just like the Sony SEL 50mm that I mentioned above, it can be great for stitching together wide panoramic landscape shots.
This is my other prime lens that lets me take sharper photos in that “normal” focal length on a cropped sensor camera. Just like the Sony SEL 50mm that I mentioned above, it can be great for stitching together wide panoramic landscape shots.
Infrared Conversion
My Recommendation: Life Pixel
Again, I haven’t had a camera converted to IR yet, but it is on my never ending list of things that I would like to do “one day”. But, if you’re a step ahead of me and are ready to try your hand at IR then the guys at LifePixel are the ones to talk to. You send your camera into them and it magically comes back to you as a Frankenstein camera that can now only see IR.
Drones / Quadcopters
My Recommendation: DJI
These are definitely more of a “fun to have” than a “must have” for photography, but when it comes to drones and aerial photography I believe that DJI is leading the charge and has been for a while. I always keep an open mind when it comes to new products coming onto the scene, but at the moment, DJI is the only company that I would look at if I was buying a quadcopter. I also found that buying directly from DJI was typically the best pricing and made the most sense. I’ve put some links to Amazon as well so that you can easily compare prices, but I would recommend buying straight from DJI.
DJI Phantom 4 (or the new Phantom 4 Pro):
![]()
![]() I use a DJI Phantom 4 for all of my aerial photos and videos. I absolutely love this drone and think that it’s the best value for a consumer drone on the market.
I use a DJI Phantom 4 for all of my aerial photos and videos. I absolutely love this drone and think that it’s the best value for a consumer drone on the market.
I fly my Phantom 4 with an iPad mini 3. And some additional accessories that I would recommend are a car charger, a battery charging hub, a 3 and 4 stop ND filter (to get the proper shutter speed for video), a screen hood (to see the screen on sunny days), and a couple of extra batteries.
DJI Mavic:
![]()
![]() A new addition to DJI’s lineup is the Mavic which is far more portable and compact than the Phantom 4. The size is one of my major annoyances with the phantom 4, and even though the Mavic lacks a bit of the capability of the Phantom, I think it’s convenience more than makes up for it. This is another one on my growing list of “one-day” purchases.
A new addition to DJI’s lineup is the Mavic which is far more portable and compact than the Phantom 4. The size is one of my major annoyances with the phantom 4, and even though the Mavic lacks a bit of the capability of the Phantom, I think it’s convenience more than makes up for it. This is another one on my growing list of “one-day” purchases.
DJI Phantom 3 Professional and Advanced:
![]()
![]() For a great deal, you can look at the Phantom 3 line which have dropped in price a lot. Even though they lack a few features of the newer drones, they’re still exceptional and have many of the same capabilities and features for a greatly reduced price.
For a great deal, you can look at the Phantom 3 line which have dropped in price a lot. Even though they lack a few features of the newer drones, they’re still exceptional and have many of the same capabilities and features for a greatly reduced price.
Photography Accessories:
Camera Backpack
My Recommendation: F-Stop
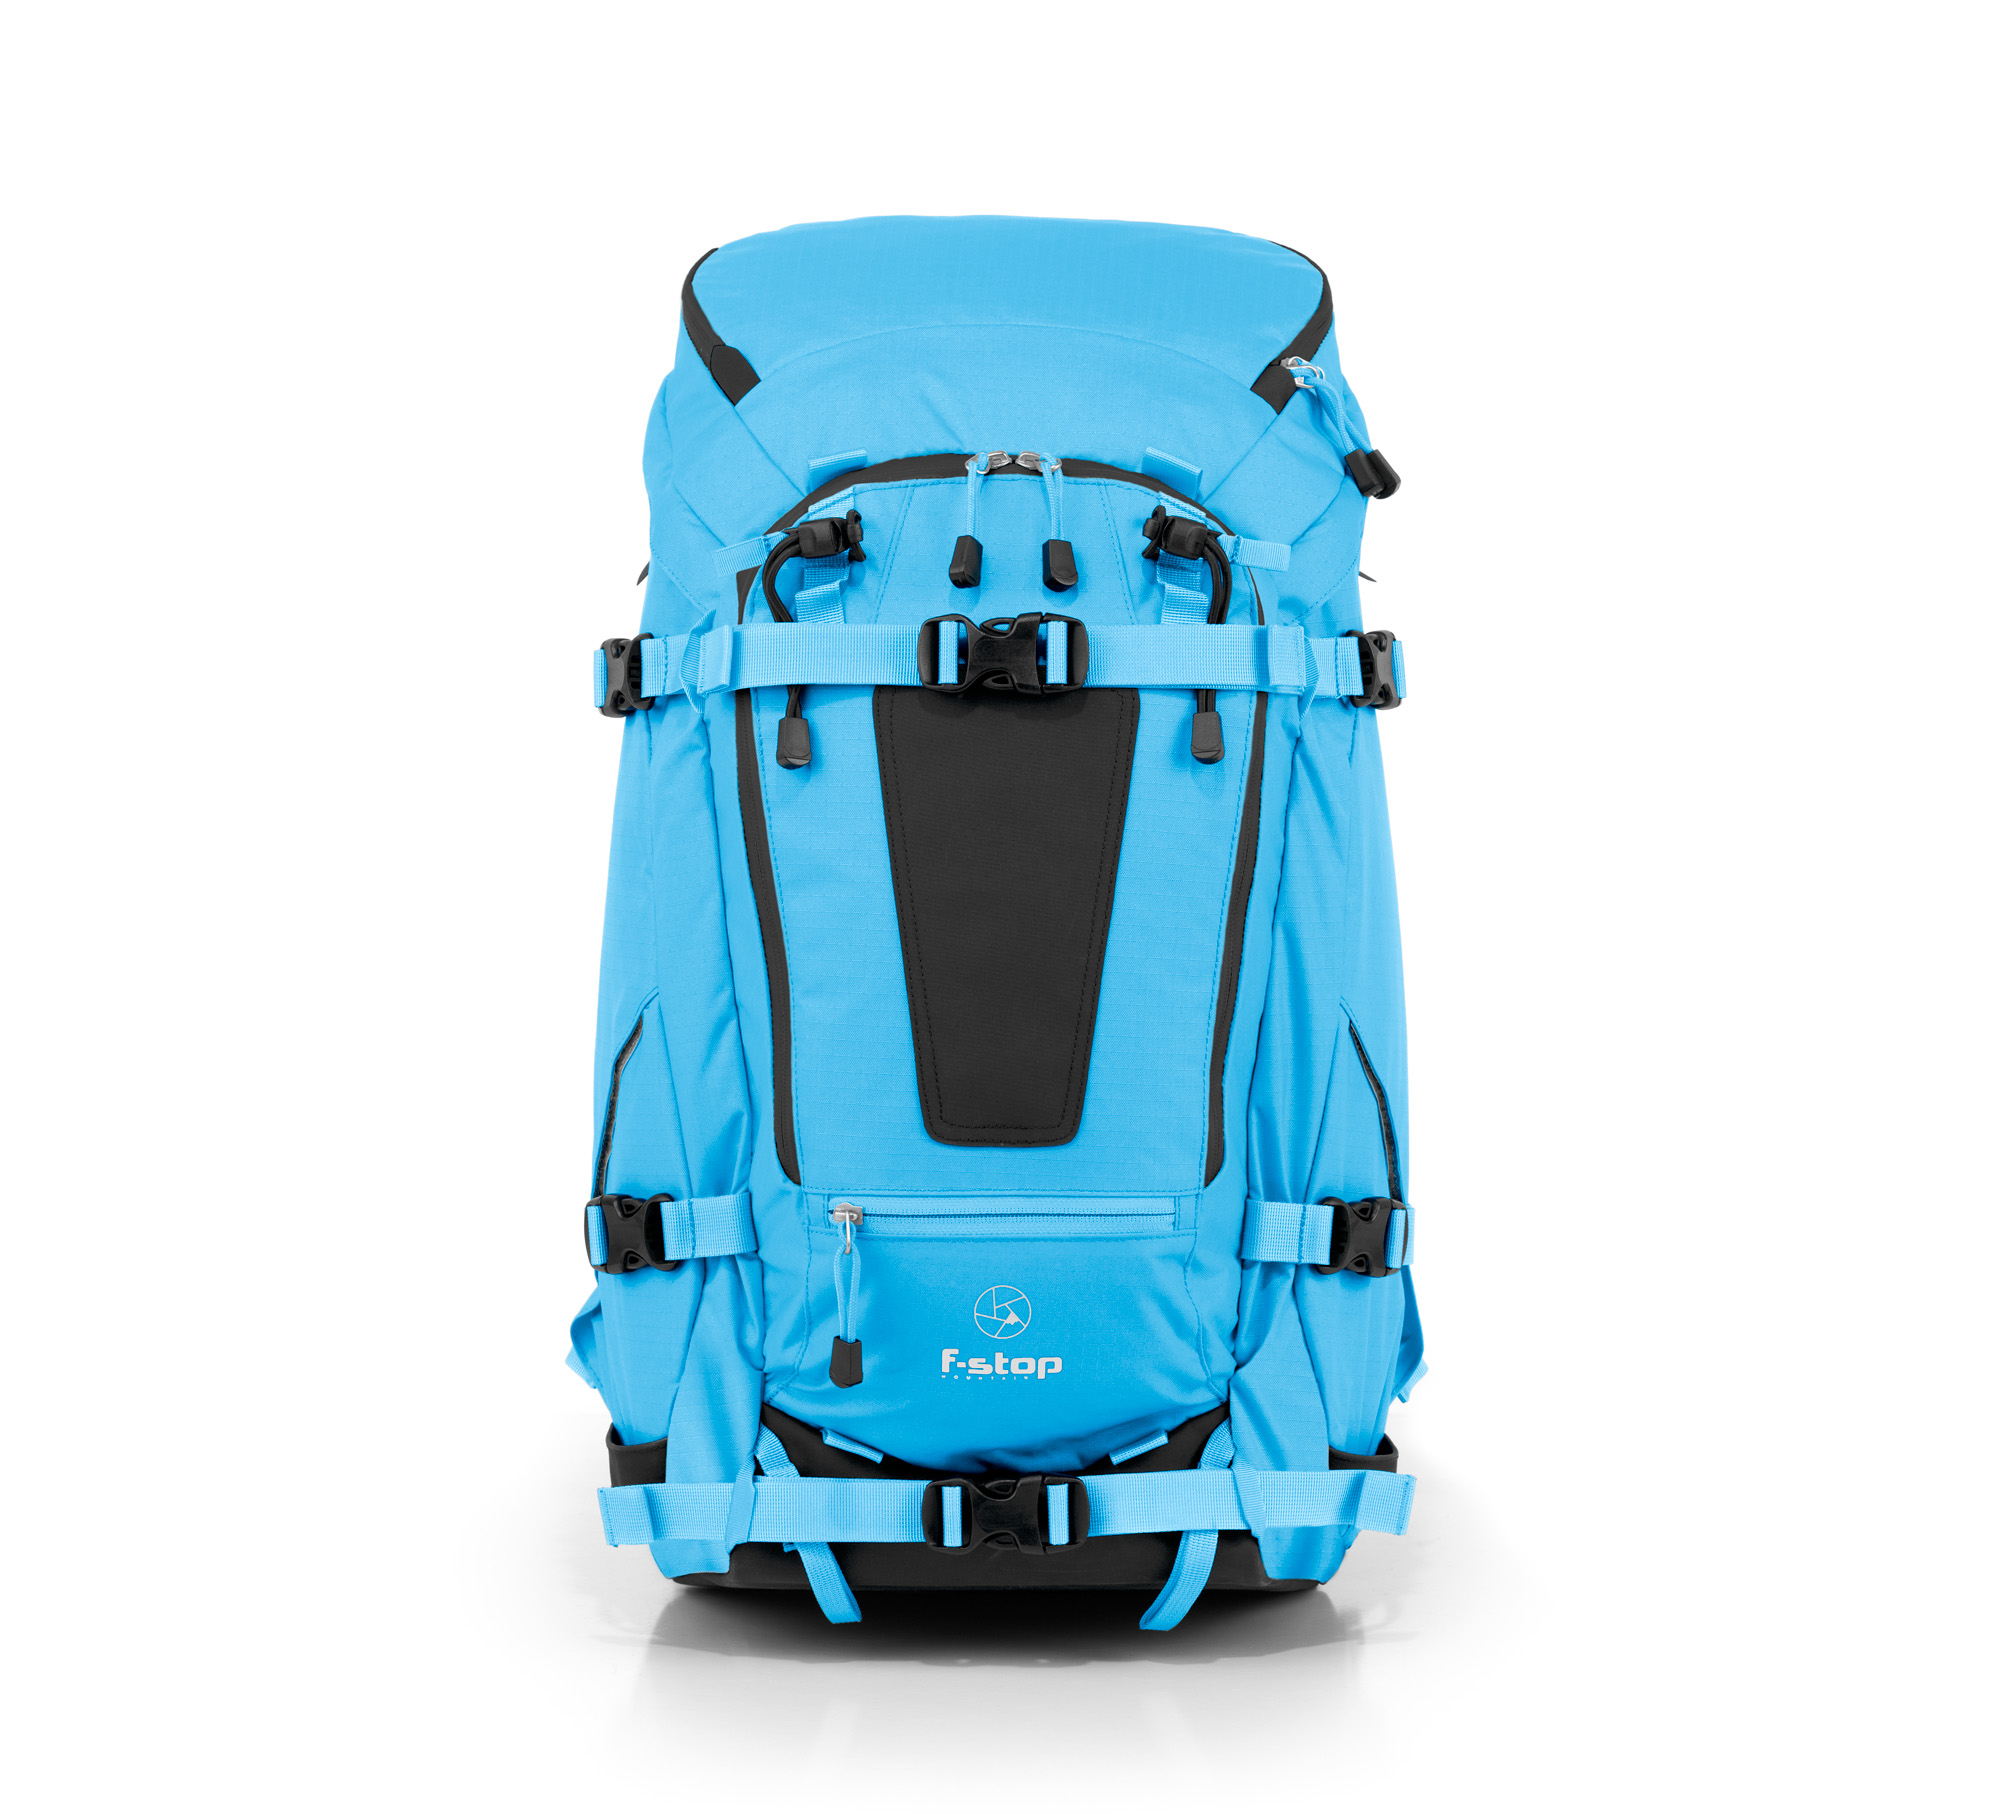
I struggled for a long time to try to find the right backpack. I do a lot of hiking, skiing, and travelling and my camera is always with me so I needed a camera bag that would allow do the things that I love to do and easily accomodate my camera gear into the mix. If that sounds familiar then I would recommend the f-stop bags as I believe that they are the absolute best on the market for an adventurer and traveller. Their packs are simply the most thought out, tough and rugged, well tested, durable, functional, and best-looking (because we all know that looks matter).
I have a Tilopa and a medium slope ICU, as well as a small pro ICU. My backpack comes nearly everywhere with me. For accessories, I also recommend f-stops lens barrels, rain cover, and gate keeper straps.
External Harddrive
My Recommendation: Lacie Rugged Hard Drives
![]()
![]() Yet another mistake that I made when I was first starting out is that I bought the cheapest external hard drive that I could (a 2TB My Passport). When I was travelling in Morocco, however, it fell off of my bed in a hostel and dropped about 2 feet and stopped working. I lost all of the pictures on the drive.
Yet another mistake that I made when I was first starting out is that I bought the cheapest external hard drive that I could (a 2TB My Passport). When I was travelling in Morocco, however, it fell off of my bed in a hostel and dropped about 2 feet and stopped working. I lost all of the pictures on the drive.
After that, I invested in two Lacie Rugged hard drives which I mirror (using Carbon Copy Cloner, a resource that I mention below). These drives are completely bombproof from what I’ve found and as I’m on the go a lot, they are my backup solution and where I store all of my photos when I’m on the road or at home.
Lacie Rugged Mini:
This is the cheapest and best bargain of the Rugged drives. They’re cheap and the only downfall is that they are limited to USB 3.0, but, as I used to only be able to run USB 2.0, this is like lightspeed for me. I have a 4TB mini that I use for a second backup of all of my photos.
Lacie Rugged Thunderbolt:
If you have a thunderbolt connection and want the fastest possible Lacie Rugged drive then this is the one for you. It’s a bit more expensive, but will speed up your workflow. I have a 1 TB Thunderbolt drive that I use as my “working drive” for holding all of my most recent photos and videos for when I’m editing.
Intervalometer
My Recommendation: JJC
![]()
![]() My intervalometer is one of my favorite tools for photography as it allows me to set up my camera to take photos at continuous intervals (for example, every 5 seconds). This is useful for shooting time-lapses or for those photos when you’re by yourself but you want to be in the picture and a 10-second timer isn’t enough. I also use my intervalometer as a cable release as well for long exposure shots.
My intervalometer is one of my favorite tools for photography as it allows me to set up my camera to take photos at continuous intervals (for example, every 5 seconds). This is useful for shooting time-lapses or for those photos when you’re by yourself but you want to be in the picture and a 10-second timer isn’t enough. I also use my intervalometer as a cable release as well for long exposure shots.
The one that I use is made by JJC and is called the JJC TM-F2, or you can get a Neewer model that is similar. To give you another option for comparing prices, I bought my JJC TM-F2 from Aliexpress as I was in Canada and this was the best option. So make sure that you check out Aliexpress as their service, delivery and price was great.
Rocket Blower Bulb
My Recommendation: Giottos Rocket Blower
![]()
![]() When you have an interchangeable lens camera, you will eventually get dirt on your sensor. The best way to clean it is with a rocket blower. It’s also good for cleaning dust and sand off of lenses and cameras to avoid wiping them with a rag.
When you have an interchangeable lens camera, you will eventually get dirt on your sensor. The best way to clean it is with a rocket blower. It’s also good for cleaning dust and sand off of lenses and cameras to avoid wiping them with a rag.
Extra Batteries
My Recommendation: Wasabi Power
![]()
![]() Having extra batteries is critical, and because the batteries for the Sony mirrorless cameras are small, it’s easy to carry lots of them. The Sony brand batteries are quite expensive, however, but you can get them from Wasabi power for a lot less. These batteries don’t last quite as long, but they work just the same and are far more affordable.
Having extra batteries is critical, and because the batteries for the Sony mirrorless cameras are small, it’s easy to carry lots of them. The Sony brand batteries are quite expensive, however, but you can get them from Wasabi power for a lot less. These batteries don’t last quite as long, but they work just the same and are far more affordable.
SD and MicroSD Cards
My Recommendation: Sandisk Extreme Pro
![]()
![]() I’ve always used Sandisk SD and microSD cards for my cameras and quadcopters and have consistently had great results. I recommend the Extreme Pro if you plan to shoot 4K. It also lets you shoot burst mode on your camera for longer, as your camera will be able to write to the card faster without filling up the buffer.
I’ve always used Sandisk SD and microSD cards for my cameras and quadcopters and have consistently had great results. I recommend the Extreme Pro if you plan to shoot 4K. It also lets you shoot burst mode on your camera for longer, as your camera will be able to write to the card faster without filling up the buffer.
Carrying Clip
My Recommendation: Peak Design Capture Pro Clip
![]()
![]() The Peak Design Capture Clip fastens onto the arm of any backpack, and then you put a plate into the thread on the bottom of the camera that clips into the clip. This lets you attach your camera to your backpack whenever you’re hiking or travelling so that you don’t need to use it around your neck, or keep taking your camera in and out of your bag. It is one of my most used and all-time favourite camera accessories.
The Peak Design Capture Clip fastens onto the arm of any backpack, and then you put a plate into the thread on the bottom of the camera that clips into the clip. This lets you attach your camera to your backpack whenever you’re hiking or travelling so that you don’t need to use it around your neck, or keep taking your camera in and out of your bag. It is one of my most used and all-time favourite camera accessories.
Click to get 10% from Peak Design with a purchase of $19.95 or more!
Or enter findaway10 when you checkout!
Camera Neck Strap
My Recommendation: Peak Design Ultralight Leash
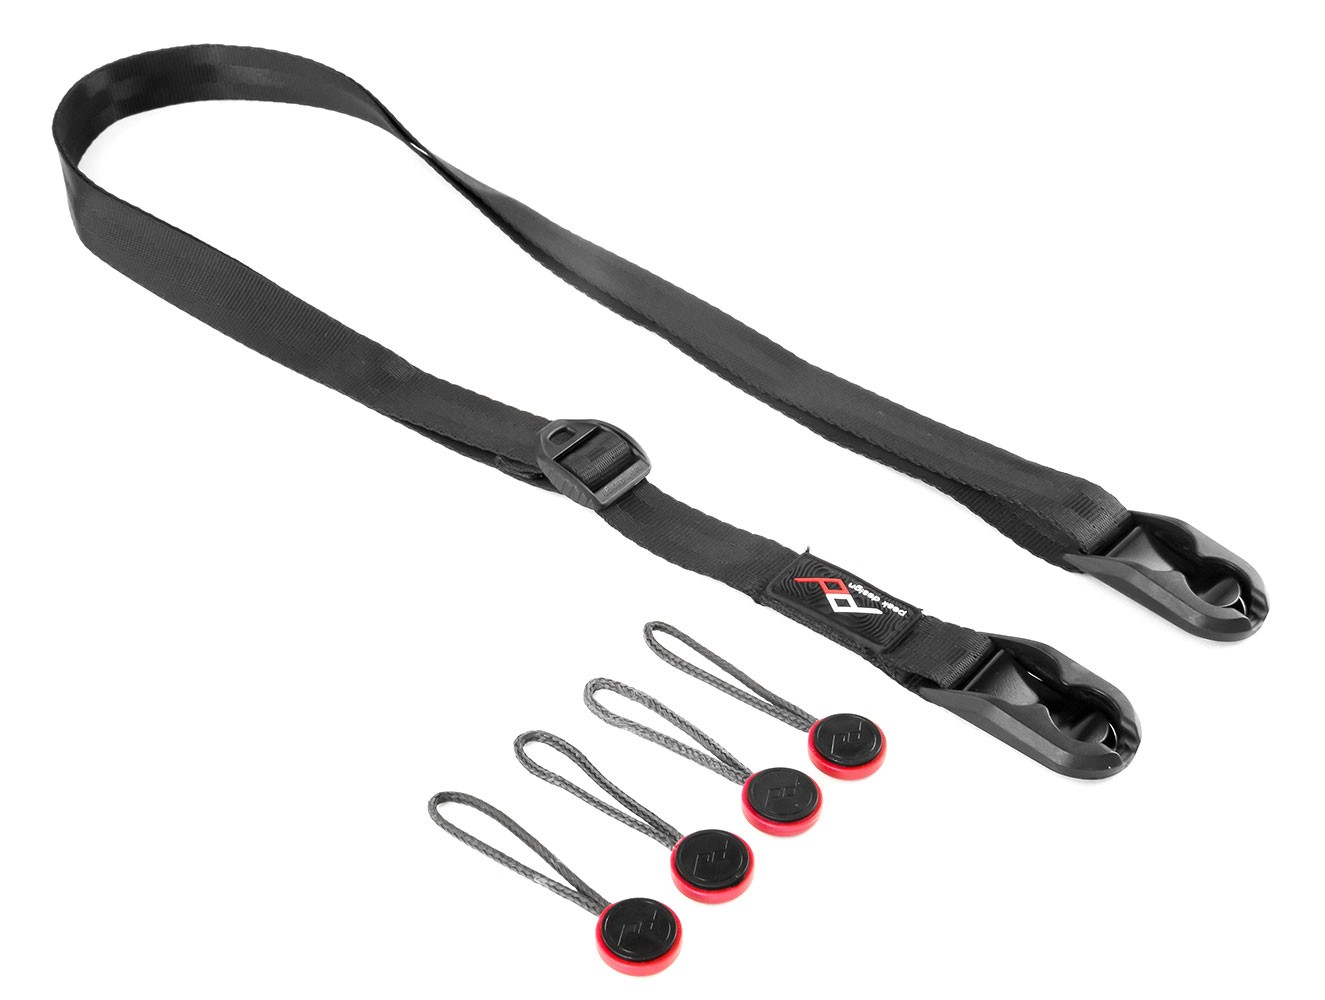
I use the Peak Design Leash Ultralight Camera neck strap and love it. Their connection system is genious and it allows you to attach and remove the strap easily. It’s simple, light, tough, and never gets in the way. And if you have your camera on a tripod and the strap is in the way or flapping in the wind, it only takes two quick snaps to remove the strap.
Click to get 10% from Peak Design with a purchase of $19.95 or more!
Or enter findaway10 when you checkout!
Camera Rain Jacket
My Recommendation: Peak Design Shell Camera Cover
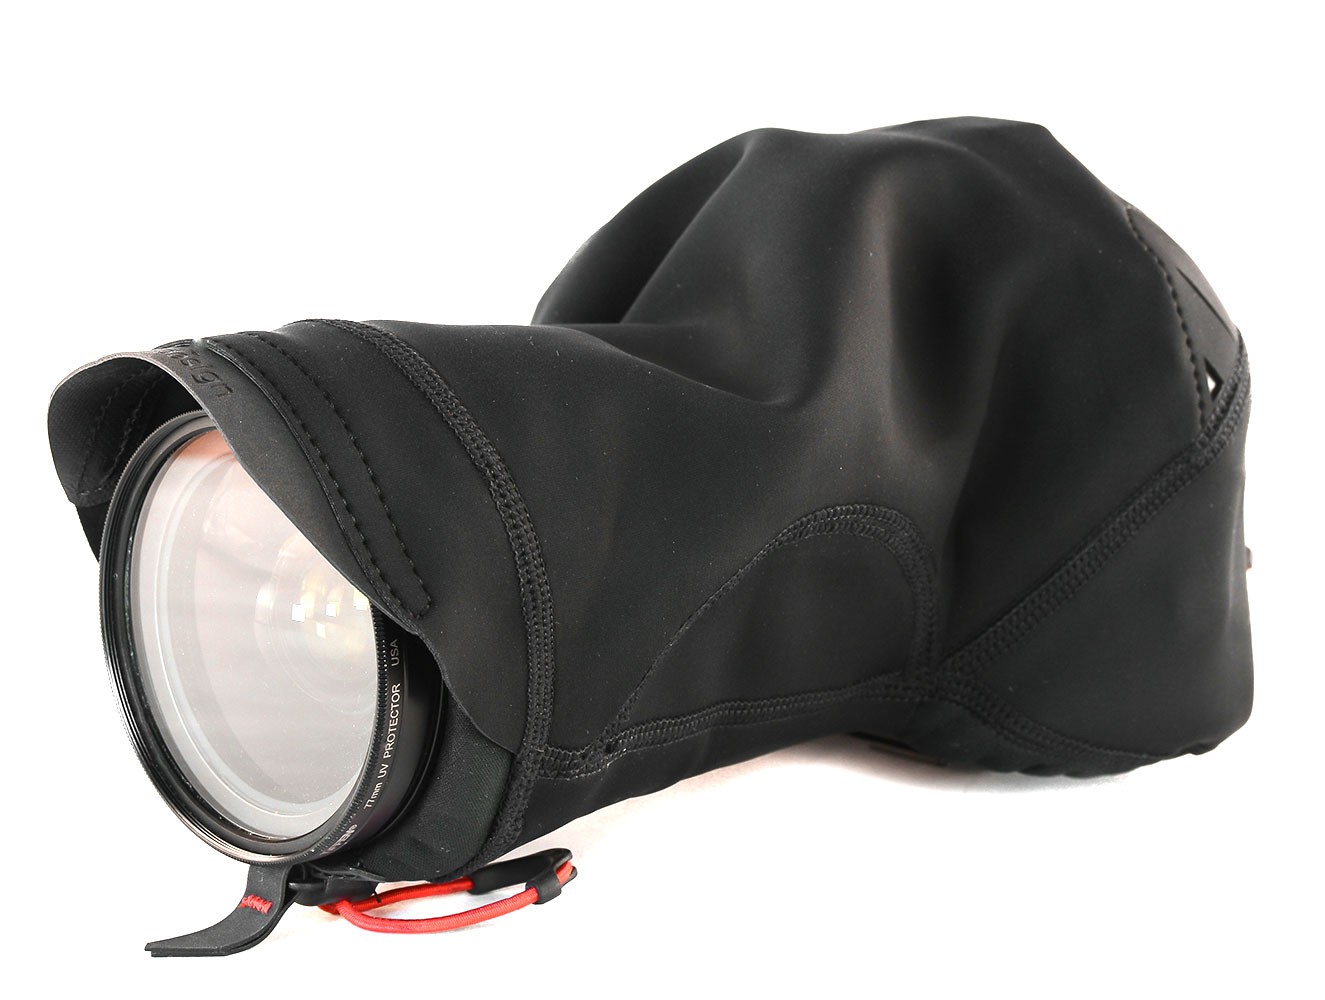 I also use the Peak Design Shell Camera Cover to keep my camera dry while shooting in rainy or wet weather. As my camera isn’t weather sealed, I usually have to put my camera away on the first drop of rain. But with the shell, I’m able to keep taking pictures once the rain starts and I’ve used it lots in places like Iceland and the Faroe Islands where rain is a common occurrence. It’s not completely waterproof and can be a bit inconvenient to use, but it at least lets you avoid packing up at the first sight of rain.
The Shell comes in a couple of different sizes and I use a size Small for my Sony a6000. If you’re not sure what size you need for your camera, the guys at Peak Design have conveniently made a sizing chart on their site that you can use.
If you don’t want to spend $45 or $50, then you can always make your own with a large ziplock bag. You cut a hole in one side for the end of your lens to stick through and then place it overtop of your camera with the ziplock side open.
As you can see, I’ve mentioned quite a few products from Peak Design as I absolutely love the things that they make. And they are always coming out with new products and cool ideas, so make sure to check them out!
Click to get 10% from Peak Design with a purchase of $19.95 or more!
Or enter findaway10 when you checkout!
Extension Tubes
My Recommendation: Kenko 10mm and 16mm
![]()
![]() I don’t have a dedicated macro lens, but for the small amount of macro that I do, I use Kenko extension tubes. They work just fine for me and essentially allow me to turn any of my current lenses into macro lenses, but extension tubes do reduce the amount of available light so you have to use higher ISO’s to keep your same shutter speed. But, the extension tubes themselves perform great and are a fun tool to have when you need to get close.
I don’t have a dedicated macro lens, but for the small amount of macro that I do, I use Kenko extension tubes. They work just fine for me and essentially allow me to turn any of my current lenses into macro lenses, but extension tubes do reduce the amount of available light so you have to use higher ISO’s to keep your same shutter speed. But, the extension tubes themselves perform great and are a fun tool to have when you need to get close.
The Kenko extension tubes that I use, come with one that is 10mm and one that is 16mm. They can then be used individually, or stacked together to make a total of 26mm. The tubes work by increasing the distance between your lens and sensor which lets your lenses focus closer to objects. The greater the distance, the smaller the minumum focal distance of your lens.
Software for Photography:
Before I get into software, I’ll just let you know that I do all of my editing on a 15” Macbook Pro. I used to use an old 13” Macbook that was glacially slow, and I was still able to run all of these programs on it, even though it was painful at times.
To me, editing and post-processing is the second half of photography and is where your photos come alive and become uniquely yours. It’s an art in itself and allows you to be creative, just as much as taking the photo itself allows you to be creative. Therefore, it’s important to have the proper software, and here is what I use and recommend.
Luminar
![]() Luminar is a relatively new photo editing program from a company called Macphun. I use another program by Macphun called Aurora HDR (see below), and I absolutely love it. That’s why when I saw Luminar, I thought I would give it a try. I don’t feel that it’s a complete replacement for Lightroom or Photoshop, but it does give your photos a different look that either of those programs and it has a ton of creative possibilities with its cool sliders, layers, masks, filters, and presets. So if you want to keep your editing workflow as simple as possible, you might be better sticking with Lightroom. But if you’re bored of the same programs that you’ve been using and want to try something new, give Luminar a shot. For the cost, it’s hard to beat and it’s a really lucrative option if you want to avoid paying the monthly subscription that the Adobe Creative Cloud has moved to.
Luminar is a relatively new photo editing program from a company called Macphun. I use another program by Macphun called Aurora HDR (see below), and I absolutely love it. That’s why when I saw Luminar, I thought I would give it a try. I don’t feel that it’s a complete replacement for Lightroom or Photoshop, but it does give your photos a different look that either of those programs and it has a ton of creative possibilities with its cool sliders, layers, masks, filters, and presets. So if you want to keep your editing workflow as simple as possible, you might be better sticking with Lightroom. But if you’re bored of the same programs that you’ve been using and want to try something new, give Luminar a shot. For the cost, it’s hard to beat and it’s a really lucrative option if you want to avoid paying the monthly subscription that the Adobe Creative Cloud has moved to.
Aurora HDR
![]() I’ve tried out several different HDR programs and never really found one that I liked until the release of Aurora HDR. Some people claim that it’s even a replacement for Lightroom and Photoshop as well, although I still prefer to do the bulk of my editing and organizing in Lightroom. It’s a super fun program to use and feels like a hybrid between Lightroom and Photoshop as it has a similar slider system as Lightroom, but also allows you to work with layers like in Photoshop. It’s a huge step for HDR editing and is by far the most robust, powerful, and easy to use HDR software available.
I’ve tried out several different HDR programs and never really found one that I liked until the release of Aurora HDR. Some people claim that it’s even a replacement for Lightroom and Photoshop as well, although I still prefer to do the bulk of my editing and organizing in Lightroom. It’s a super fun program to use and feels like a hybrid between Lightroom and Photoshop as it has a similar slider system as Lightroom, but also allows you to work with layers like in Photoshop. It’s a huge step for HDR editing and is by far the most robust, powerful, and easy to use HDR software available.
Adobe Lightroom
Lightroom is a must-have piece of software for photo editing and is where I do about 95% of my work. I do everything from import, to organization, to editing, and publishing or exporting in Lightroom. In recent years, Adobe has moved its programs to a cloud subscription (called Adobe Creative Cloud) which means that you now have to pay monthly for it, but it’s relatively affordable for what you get and it’s well worth the investment.
Adobe Photoshop
Photoshop is also part of the Creative Cloud subscription offered by Adobe, and it’s where you can handle all of the tough and stubborn photos. I don’t use Photoshop very often, but it’s capabilities and options are endless so it’s a great program to understand and know your way around.
Apple Final Cut Pro X
I do all of my video editing in Apple’s Final Cut Pro X. Lots of people complain about using Final Cut Pro X, but I find it easy to use and allows me to do everything that I need to accomplish. If you’re part of Adobe’s Creative Cloud subscription then I would recommend that you use Adobe Premiere instead as many people prefer it. Otherwise, Apple’s one-time cost makes it fairly lucrative. (I’m still using Lightroom 6 and Photoshop CS6 so I haven’t moved to the cloud subscription yet).
Carbon Copy Cloner
I mentioned above that I have two hard drives that I mirror so that I have a second backup of all of my photos. The software that I use to do this is really great and is called Carbon Copy Cloner. I highly recommend it.
CrashPlan
While having two copies of my photos might be enough, I also like to back my photos up to the cloud. With software like CrashPlan, this has never been more affordable or easier. It costs roughly $15 per month and allows you to store any of your files on the cloud for safe keeping. The only issue is that if you have a large amount of files (over 750GB or so) to backup, it can take quite a while. Even with a good internet connection, the fastest transfer rate that I’ve ever gotten was about 5 to 10 mb/second.
I prefer Crashplan’s service, but another popular company to try is Backblaze.
Clothing that Makes Being Outside Awesome:
Even though clothing doesn’t necessarily help you make better photographs, it is critical for being comfortable when travelling and adventuring. Some of the best pictures you can take are in storms and in tough to reach places, but if you don’t have the clothing that allows you to be there, then you simply can’t get the photos. I’m a firm believer that there is no such thing as bad weather, there is just improper clothing for the weather.
Fjallraven Pants
![]()
![]() I’ve always struggled to find pants that were durable, light, and comfortable. But since I’ve started wearing Fjallraven pants on all of my adventures, I won’t ever be able to wear anything else. I typically get the Keb Trouser Pants as they have stretchy panels so that you can hardly feel the pants and they give you full range of motion. With the Keb Gaiter pants, you can even zip the bottoms off when it gets warm out and turn them into shorts.
I’ve always struggled to find pants that were durable, light, and comfortable. But since I’ve started wearing Fjallraven pants on all of my adventures, I won’t ever be able to wear anything else. I typically get the Keb Trouser Pants as they have stretchy panels so that you can hardly feel the pants and they give you full range of motion. With the Keb Gaiter pants, you can even zip the bottoms off when it gets warm out and turn them into shorts.
Fjallraven also makes a pant called the Vidda Pro that isn’t quite as stretchy but is super tough and hard wearing and also looks really awesome. They also come in a bunch of unique colours.
I can’t speak highly enough about these pants, and they are all that I wear while hiking, travelling, and adventuring now. Plus, they make you look super cool!
Fjallraven is a Swedish company and they make most of their gear out of a material called G1000 which is really tough and durable. You can also buy a wax that you apply to this material using a hot iron or heat gun which makes the material even more wind and water resistant. Besides pants, Fjallraven also makes cool backpacks, jackets, shirts and other gear so make sure that you check them out!
Arc’teryx Jackets and Pants
![]()
![]() For down jackets and shells and any sort of outerwear or outdoor gear, I usually find myself looking towards ArcTeryx. I have an ArcTeryx Alpha SV jacket that I wear in rain and wind and it goes everywhere with me. And for super cold weather I have ArcTeryx Theta SV down jacket. For pants in the rain, wind, and snow I use the ArxTeryx Theta SV Bib pants.
For down jackets and shells and any sort of outerwear or outdoor gear, I usually find myself looking towards ArcTeryx. I have an ArcTeryx Alpha SV jacket that I wear in rain and wind and it goes everywhere with me. And for super cold weather I have ArcTeryx Theta SV down jacket. For pants in the rain, wind, and snow I use the ArxTeryx Theta SV Bib pants.
While all of this clothing costs a small fortune, it allows me to be completely comfortable in all weather in the backcountry or while travelling and for me this is a critical investment. And in terms of good quality gear and a company that stands behind the products that it makes, there is no better that Arc’Teryx.
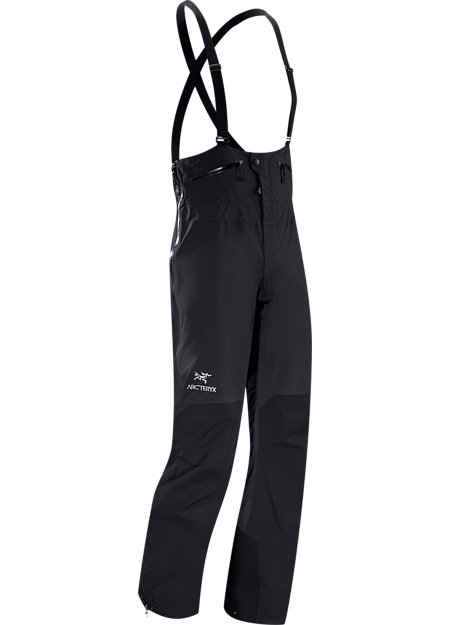
If you are looking at their pants and jackets for the first time, I’ll shed a bit of light on their somewhat confusing sizing and naming. The designations of Alpha, Beta, Theta and so on, designate the size and fit of the clothing. Alpha is the standard size, Beta is a bit shorter, and Theta fits a bit longer. Then the designations of SV, AR, SL, and FL designate the build and purpose of the equipment. SV stands for Severe and is the thickest and toughest clothing for the coldest and harshest conditions, AR is the all-around equipment, FL is fast and light and is lighter clothing that offers less protection but won’t slow you down, and SL is superlight for the minamalist clothing.
Patagonia Jackets
![]()
![]() Another company that makes awesome clothing and equipment is Patagonia. I especially love their fleeces and down jackets. I have an M’s Down Jacket and an M’s Nano-Air Hoody. The Nano-Air Hoody is one of my favorite pieces of clothing as it is a synthetic down jacket. This means that it stays warm even when it’s wet. It’s also super stretchy and breathable and is super warm for its size and weight.
Another company that makes awesome clothing and equipment is Patagonia. I especially love their fleeces and down jackets. I have an M’s Down Jacket and an M’s Nano-Air Hoody. The Nano-Air Hoody is one of my favorite pieces of clothing as it is a synthetic down jacket. This means that it stays warm even when it’s wet. It’s also super stretchy and breathable and is super warm for its size and weight.
Patagonia makes a bunch of cool retro-looking gear as well and their shells and pants are really cool as well, even though I don’t own any myself.
Books that I Recommend:
A lot of learning that you do in photography comes from practice and time working with your camera, but I also love working my way through a book and find that it is a great way to further your knowledge at your own pace.
The Digital Negative (by Jeff Schewe)
![]()
![]() The Digital Negative is one of my favorite photography books. It’s quite technical and advanced in some parts, but it gives you a lot of good information about lightroom and photoshop that I have never found anywhere else. So it’s not necessarily a beginner’s book, but if you’re comfortable in Lightroom, it’s a great book to read to take your understanding a little bit further.
The Digital Negative is one of my favorite photography books. It’s quite technical and advanced in some parts, but it gives you a lot of good information about lightroom and photoshop that I have never found anywhere else. So it’s not necessarily a beginner’s book, but if you’re comfortable in Lightroom, it’s a great book to read to take your understanding a little bit further.
Jeff Schewe also has some other books such as the Digital Print which may also be worth checking out.
Understanding Exposure (by Bryan Peterson)
![]()
![]() I’ve read several books by Bryan Peterson and am always impressed by his style and ability to easily explain and help you understand concepts. His most well-known is “Understanding Exposure” and while the methods are slightly dated, it gives you a great understanding of the basics of metering, and getting a properly exposed photo. Other books of Bryan Peterson’s that I would recommend are Understanding Flash Photography, Understanding Photography Field Guide, and Understanding Close-Up Photography.
I’ve read several books by Bryan Peterson and am always impressed by his style and ability to easily explain and help you understand concepts. His most well-known is “Understanding Exposure” and while the methods are slightly dated, it gives you a great understanding of the basics of metering, and getting a properly exposed photo. Other books of Bryan Peterson’s that I would recommend are Understanding Flash Photography, Understanding Photography Field Guide, and Understanding Close-Up Photography.
The $100 Startup (by Chris Guillebeau)
![]()
![]() There are a lot of books that talk about alternative business methods and becoming an entrepreneur in a non-typical fashion, but one of the most actionable and enjoyable reads that I’ve found is Chris Guillebeau’s “The $100 Startup”.
There are a lot of books that talk about alternative business methods and becoming an entrepreneur in a non-typical fashion, but one of the most actionable and enjoyable reads that I’ve found is Chris Guillebeau’s “The $100 Startup”.
The Fountainhead and Atlas Shrugged (by Ayn Rand)
![]()
![]() Even though I mostly read fiction, this is the only fiction book that I’ll recommend here. The Fountainhead is a bit of a different book, but it’s one of my favorites and has the ability to change the way that you look at some things. Atlas Shrugged is a similar book that presents the same idea with a different story (which many people say is better). Both books are written by the author Ayn Rand.
Even though I mostly read fiction, this is the only fiction book that I’ll recommend here. The Fountainhead is a bit of a different book, but it’s one of my favorites and has the ability to change the way that you look at some things. Atlas Shrugged is a similar book that presents the same idea with a different story (which many people say is better). Both books are written by the author Ayn Rand.
SEO for Photographers and Creative Professionals
 This one is an e-book, but if you are a photographer starting a website, then this is a must read in order to understand how to get your site ranking on the top pages of Google through SEO. Dan explains the concepts so easily and everything is specifically related to photograpers.
Writing:
Having a website a putting together blog posts means that I do quite a bit of writing. Here are a few of the tools that I use to write and make the process easier. If you’re doing any sort of writing, you should definitely check them out.
Google Docs
I do all of my writing for my site on Google Docs. I like being able to access my documents from anywhere that I am and it saves automatically, so there’s no more frustration when you lose all of your work because it’s all stored on the mysterious cloud.
Grammarly
For the supreme spell-checker, you can install grammarly in your web browser to be like the strict English teacher looking over your shoulder as you write. But in a good way.
Travel and Trip Planning:
Google Flights
My go-to site for booking flights and planning any trip is Google Flights. I find the way that you can view the map, or the calendar, or see all of your different flight options on one page very intuitive and easy to use.
Maps.me
Any time I go on a trip, I try to download the map of where I’m going on maps.me before I go, either to my iPad or my phone. I still get lost more than I should, but it at least helps me get found again.
Rough Guides
For information on a destination and country, there isn’t anywhere more thorough or accurate than Rough Guides. They also make hard copies of the travel guides, although I generally don’t bother travelling with guides anymore, but they are one of the best if you like to have a book with you.
iPad Mini
![]()
![]() One of my new favourite travel tools is my iPad Mini 3. I now use it for reading e-books and downloading books from libraries to have on the road. It’s also useful for adding maps of the places that I’m going, doing writing on the road, and doing research and internet browsing while on the road.
One of my new favourite travel tools is my iPad Mini 3. I now use it for reading e-books and downloading books from libraries to have on the road. It’s also useful for adding maps of the places that I’m going, doing writing on the road, and doing research and internet browsing while on the road.
For some short trips, I’ll actually leave my laptop at home (I only use my laptop for importing my photos to harddrives and editing) so it saves me a ton of room and weight.
Logitech Bluetooth Keyboard
![]()
![]() I use a Logitech keyboard from Amazon and it works great. There are tons of other options as well but I’m pretty happy with mine and it turns the iPad into a small computer.
I use a Logitech keyboard from Amazon and it works great. There are tons of other options as well but I’m pretty happy with mine and it turns the iPad into a small computer.
Online Business and Website Building:
Getting a website and business up and running is hard enough as it is without having to decide all of the different products and tools that you’re going to use. I haven’t figured it all out myself, but I have spent a long time wading through the different pros and cons of each tools and resource, and this is what I am currently using to turn the wheels of my site.
Bluehost
![]() I am currently hosting my site with Bluehost. I pay roughly $12 per month for the hosting and about $18 per year to keep my domain name registered. Bluehost has great customer support and they’ve been able to help me with any issues that I’ve had so far with fast and direct communication.
I am currently hosting my site with Bluehost. I pay roughly $12 per month for the hosting and about $18 per year to keep my domain name registered. Bluehost has great customer support and they’ve been able to help me with any issues that I’ve had so far with fast and direct communication.
Elegant Themes (DIVI Theme)
![]() I built my website on the WordPress platform, and the theme that I used is one by a company named Elegant Themes. The name of the theme itself is Divi.
I built my website on the WordPress platform, and the theme that I used is one by a company named Elegant Themes. The name of the theme itself is Divi.
I really like using it and it’s extremely customizable and easy to use. When I was first picking my theme, the only downside with Divi was that their page builder was a back-end builder, meaning you have to keep switching between the builder and the page viewer to see what you were creating. But they have recently introduced a front end builder as well, so this isn’t even a factor which makes Divi an even better choice.
Elegant Themes also just released another Pro theme called Extra which looks really awesome as well. I purchased the lifetime subscription to Elegant Themes meaning that I paid a one-time fee and receive access to all of their themes (including Divi, Extra and hundreds of others) as well as support and upgrades for life. Not a bad deal!
CSS Hero

To add that extra bit of customization to your site, sometimes you have to get your hands dirty and get into the coding of the site. I don’t do a ton of this, but when I need to edit some CSS on my site, I tend to rely on CSS Hero.
It makes editing the CSS so much easier, and it’s a huge time saver and gives you so many more options without having to learn all of the ins and outs of CSS.
Evernote
For taking notes, making lists, and keeping track of ideas, I use an app called Evernote. It also keeps things synced between all of my devices so I have access to my notes on all of the devices.
If you’re looking for a way to keep your notes, lists, and thoughts all in one place, then you should try out Evernote. You can sign up for free with a basic account and if you use to button on the right, then you can get one month free with a Premium account to see what you think of it. Premium allows you to access and edit your notes offline and have Evernote active on more than 3 devices at a time.
Nextgen Gallery
For the gallery on my site where my photos are displayed, I decided to go with Nextgen Gallery. Also, when you click on a photo on my site and it opens in the lightbox window, this is from the Nextgen plugin.
I like the way that Nextgen allows you to display your gallery on your own site. But another option if you only have a gallery, or don’t mind having your gallery separate from your main site, I would recommend SmugMug.
I use the Nextgen Plus version of the plugin and payed around $50 (there is also a free version of the plugin). My favorite features are the pro masonry gallery and the Pro Lightbox.
Some people find Nextgen difficult to use because it involves copying and pasting shortcodes into your site to insert galleries, but once you get the hang of it, it is very simple and straightforward. And realistically, you only need to get things set up once and then you can leave it alone.
Yoast SEO
For all of your SEO needs, the Yoast SEO plugin is a must if you run a wordpress site. It’s really easy to use and makes it really easy to ensure that the pages of your site have the best chances of being found by search engines.
You can sign up for both a premium or free version of the plugin. At the moment, I’m perfectly happy with only the free version and it does everything that I need out of an SEO app, but there is also the premium version for additional features such as quicker support, ability to use multiple keywords for a post or page, and customized configuration and installation.
Updraft Plus
Keeping your site backed up and safe is key, and for this I use Updraft Plus. I completely understand the importance of having reliable and safe backups of you site done regularly and doing them manually is a huge pain. At the same time, however, when your site is just starting out, it’s hard to spend lots of money on monthly plugin subscriptions.
Therefore, for a free site backup plugin, my favorite option was Updraft Plus. If you’re able to fork out a bit of money to get more out of the plugin, however, then there is Updraft Plus Premium which will give you 16 GB of storage with Updraft Vault, more options for automatic backups, and a pile of other features.
WP/LR Sync
This is by far one of my favorite and most useful plugins. It takes a little bit of effort to get it set up and costs a small amount (about $42 for use on up to 3 sites). But once you get the plugin installed on your site, as well as in Lightroom, it allows you to upload photos to your site directly from Lightroom. Also, if you make changes to the photos in Lightroom, you can just republish it and it will automatically update the photo on the site.
Podcasts:
Podcasts are becoming more and more popular every day, and if you’re not currently listening to any, then I highly recommend that you look into them. I used to have an hour commute to work each day and quickly got tired of the radio, and listening to music. But when I discovered podcasts, I actually looked forward to driving, or going to the gym, or anything that gave me time to listen to podcasts. Here are some of my favorites:
TED Radio Hour
If you’re familiar with TED talks and enjoy listening to them, then you’ll love TED Radio Hour. Each week they have a theme and put together a show around that theme with segments of TED talks, interviews, and discussion.
The themes and topics are always really interesting and you learn something cool and interesting every episode.
The Fizzle Show
The Fizzle Show is my absolute favorite podcast. These guys talk about online business and how to create a lifestyle type of business doing something that you care about. It’s super funny and they always have practical and real advice.
I won’t say any more about it, but if you’re interested in online business or creating a side-hobby that makes a small income, then you have to listen to this one!
The Alpha Mirrorless Podcast
The Alpha Mirrorless Podcast is part of the TWIP (or This Week in Photo) network, which is a website featuring several different shows and podcasts which are all really awesome. This specific podcast focuses on the mirrorless cameras by Sony (which are one of my resource recommendations above) as well as general photography advice. It’s jam packed with great ideas and info.
Once you’re done listening to the Alpha Mirrorless Podcast, you can find Andy and Juan (the hosts) on their newest podcast called “The Recompose Podcast.”
Smart Passive Income Podcast
The Smart Passive Income podcast by Pat Flynn is the first podcast that I ever started listening to. Pat has become a big name in the internet world today, but I went back and listened to his first episode, all of the way to his most recent and you can see how his business and outlook changes throughout his years building his company. He always has great guests and gives straightforward, actionable advice.
Photography Apps:
While you’re out and about taking pictures or planning a photo adventure, there are a few apps that can help you prepare.
Clear Sky Chart
One website and resource that can be very helpful for planning a night shoot is called Clear Sky Chart. This will give you information about things like cloud cover, expected darkness, wind, and times that the moon will rise and set. It gives a forecast for 2 days ahead so you can plan your photo outings accordingly.
The Photographer’s Ephemeris
The Photographer’s Ephemeris (or TPE as the cool kids call it) is another app that helps you plan a photo outing. You can install it on your computer as well as on your iPhone or Android.
It’s nice because it works anywhere in the world as well, so it’s great for planning a photo if you are abroad or close to home.
Dark Sky Finder
Dark Sky Finder is a simple but interesting site that shows you how much light pollution (or how dark you can expect the sky to be) in certain sites and locations. It doesn’t show the entire world but there are many sites throughout North America listed.
PhotoPills
Photopills is an app that costs about $10 that has a lot of features to help you plan a photo shoot. You can use it to plan when the sun or moon will be in a certain location for the perfect shot.
Or you can plan a star trail shot or timelapse. There are a ton of other features as well that are all included in the app that make a really powerful tool for planning your next photo outing.
Stellarium
Stellarium is a free desktop app that simulates the night sky so that you can see where the Milky Way or other key features of the night sky will be at certain times throughout the year.
Star Walk 2
Star Walk 2 is a great app that works on iOS or Android that you can use while out stargazing or planning a night photo shoot. You can hold your phone up to the night sky and by lining up what you see on your screen with the night sky you can identify constellations and planets.
StarStaX
For a quick and easy solution for making star trails that works on both Windows and Mac, check out StarStaX. It’s free to use and lets you make the images of stars streaking across the night sky in long arcs.
Courses:
If you’re looking to take your learning one step further in regards to online business or photography, then sometimes an online course might be what you’re looking for. If you’re in the market for some courses, here is what I recommend:
5 Day Deal
For the best deal around, you have to check out what the guys at 5 Day Deal are doing. They put together a bunch of courses, presets, e-books, and templates from some of the biggest names in photography and sell the bundle during a period of 5 days for a greatly reduced price (usually 97% reduced).
So you pay around $80 to $100 and get thousands of dollars worth of courses. Their photography bundle usually comes out in the middle of October, but they often have other bundles available at different times throughout the year for things like business or video.
Trey Ratcliff (from Stuck in Customs)
I’ve checked out a few courses from Trey, over at Stuck in Customs, and have learned a lot from them. He’s best known for his 40 minute free HDR tutorial, which is great. His teaching style is relaxed and non-intimidating which makes it easier to get into the courses.
The courses that I’ve checked out were Trey’s Lightroom course, and his New Zealand Landscape Tutorial which were part of the 5 Day Deal’s that I mentioned above. If you click on the button to the right, you can also get 10% off of any purchases from the Stuck in Customs Store!
Fizzle Membership
If you’re looking for online business courses and advice, then look no further than Fizzle. These guys run a membership site that is full of courses on everything that you need to know about starting an online business, and when you join you get access to the Fizzle community to talk to other people doing the same thing as you.
At the time of writing, you can join for two weeks for free, and then it costs $35 per month which is very affordable for what you get.
Adventure and Outdoor Gear:
Even though this isn’t necessarily photography gear, this adventure gear often gets me out into really cool places in the backcountry to take pictures. It lets me do multi-day hikes or stay on top of a peak to catch the sunrise in the morning.
TarpTent
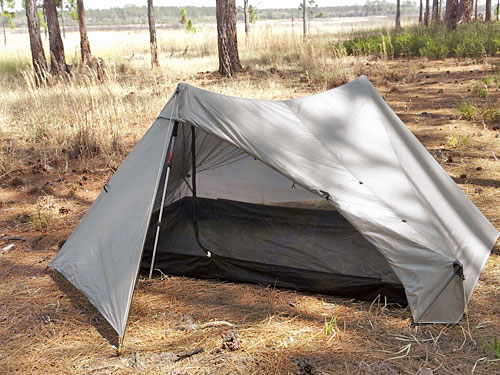 For a long time, I couldn’t find a tent that was lightweight and small, but still sturdy enough to withstand winds and rain. When I found TarpTent, however, it was everything that I was looking for. I currently use the TarpTent Statosphire 1 and love it. It’s a little bit more tricky to set up, but once you get the hang of it, it’s well worth it.
These tents don’t use standard tent poles to set them up, but instead are set up with your hiking poles. This saves you the space and weight of having to carry poles and also makes the tents tougher and more stable.
After doing some research of their tent line, I found that if you wanted to be minimal on weight and space, you should look at the Notch, and if you wanted a 4 season tent that could withstand anything and you weren’t worried about weight, then the Scarp would be an option. But for a really solid all-around choice that is sturdy, comfortable, and fairly light and small, the Stratospire is a great choice.
Tarptents aren’t fancy or colourful, but they are handbuilt and of really high quality. And for the quality of tent that you get, they are priced very well as they are sold directly and not through a wholesaler.
Thermarest XTherm
![]()
![]() For a comfortable, warm, lightweight, and small mattress, I would only recommend the Thermarest Xtherm. If you don’t need the extra insulation, then for some weight saving, you should look at the Thermarest XLite.
For a comfortable, warm, lightweight, and small mattress, I would only recommend the Thermarest Xtherm. If you don’t need the extra insulation, then for some weight saving, you should look at the Thermarest XLite.
I opted for the regular size and width and have never had any problems with it being too narrow or short. I’m about 6’0 tall and sleep on my stomach or side and I sleep like a rock on the XTherm (assuming that rocks sleep well of course). It packs super small, and is lightweight too. Lots of people complain about them being loud when you move around but that is craziness and I’ve never found it to be a problem.
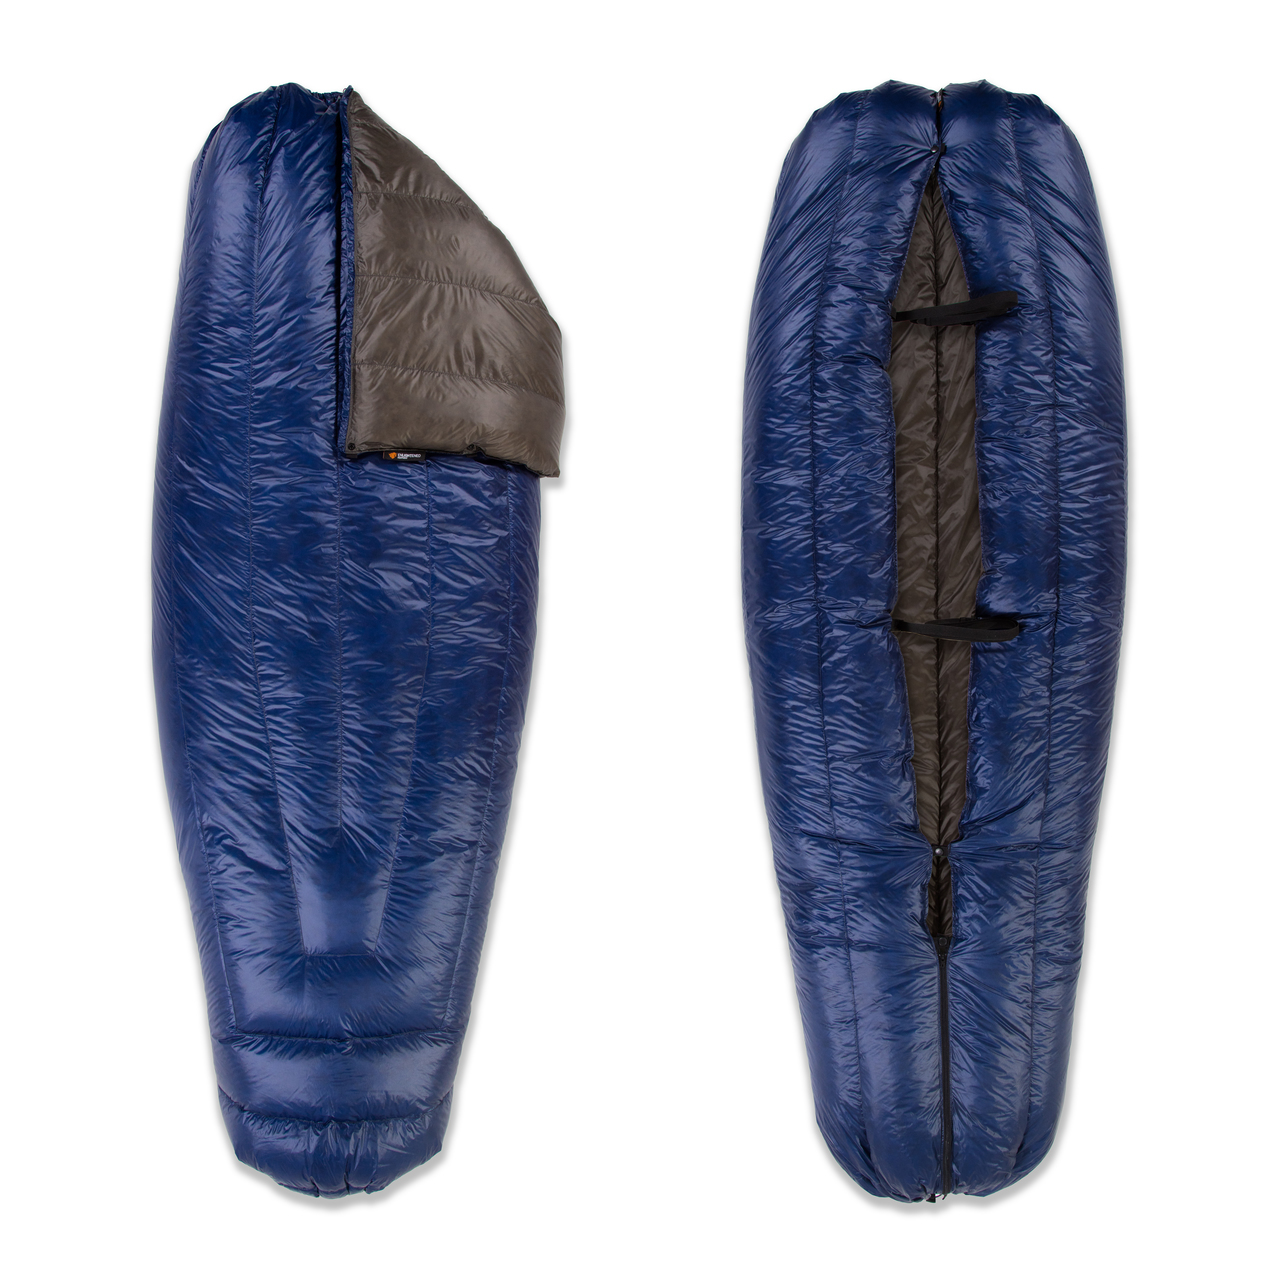
Enlightened Equipment Revelation Sleeping Quilt
 At the moment, I’m using a sleeping bag from MEC called the Aquila -7 Celcius mummy sleeping bag. It packs small and has kept me warm in all types of conditions and all over the world in different countries.
When it comes time to upgrade, however, I will be looking at a quilt from Enlightened Equipment. I always sleep with my bag completely unzipped like a quilt anyways as I don’t like sleeping in a bag, and the quilts from EE are supposed to be the highest quality and they are a really cool company as well.
I really like the Revelation quilt and when you order a quilt you are able to customize the colours, fill material, length, width and a few other things. All of their quilts are hand-made and are supposed to be really great quality. I haven’t tried them myself, but it’s another item on my growing list of “gear to buy.”
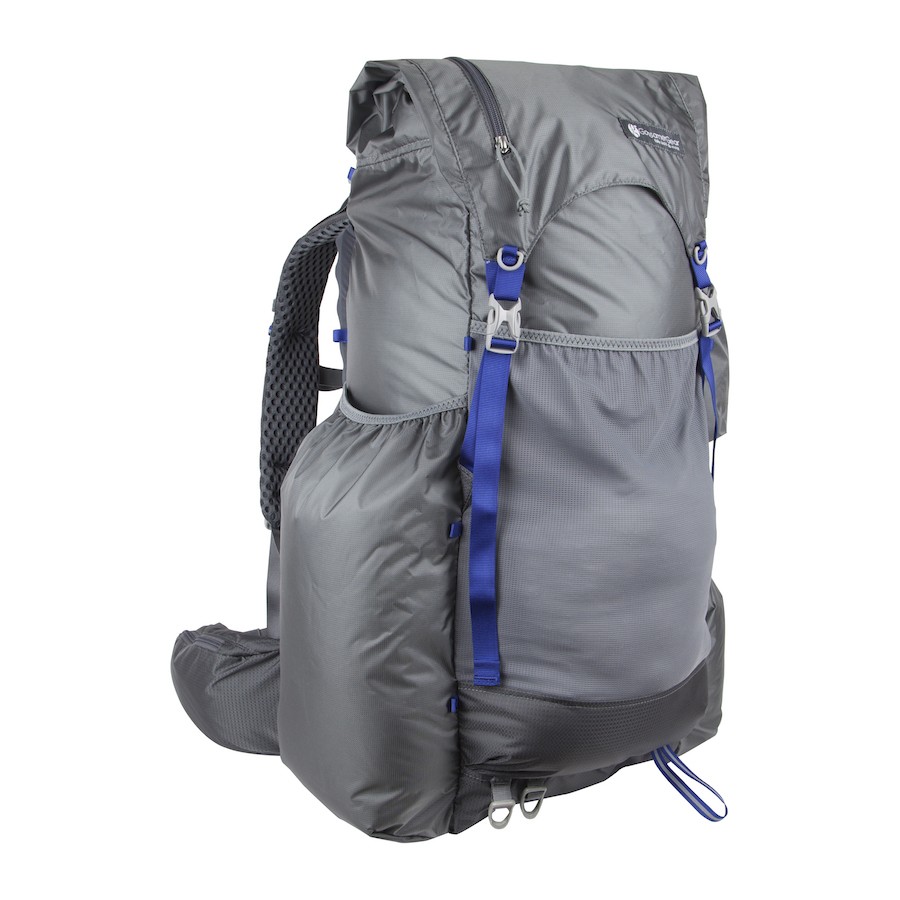
Gossamer Gear Mariposa 60 Backpack
 At the moment, my main pack for overnight trips and backpacking is a 65 litre Northface backpack. It’s a tough pack and has been fairly good so far. My main complaint, however, would be that it is quite heavy.
Therefore, when it comes time to upgrade, I will be looking towards something from Gossamer Gear, such as their Mariposa 60 Backpack. This is yet another company that makes simple, effective, and high-quality handmade products. Rather than pay for an expensive brand name or flashy colours, you are getting a great product that is carefully designed and built.
I like the Mariposa 60 because it is very lightweight and has a high volume so that unpacking and repacking your bag isn’t a chore. Hopefully, when you have a lighter backpack, it means that you are carrying less and that all of your other gear is lightweight and minimal as well because having a light pack and lots of heavy gear doesn’t work out very well. But if you’re looking for a lightweight pack that is high quality, check out what Gossamer Gear is doing!
Primus Omnifuel II Stove
![]()
![]() A stove is crucial for backcountry cooking, and I also take mine on a lot international trips if I’m tenting or doing a lot of hiking. Because of this, I love the Primus Omnifuel II, as you can burn pretty much as gas in it. So when you’re overseas you can use whatever is handy, from gasoline, to diesel, to LPG gas canisters.
A stove is crucial for backcountry cooking, and I also take mine on a lot international trips if I’m tenting or doing a lot of hiking. Because of this, I love the Primus Omnifuel II, as you can burn pretty much as gas in it. So when you’re overseas you can use whatever is handy, from gasoline, to diesel, to LPG gas canisters.
Another comparable stove is the Optimus Nova. I like the way that the legs fold around the burner on the Nova and the magnetic cleaning of the nozzle seems to be a great design.
Other Cool Websites:
There is so much information and noise out there in the wild world of the internet that it can be hard to find what you’re looking for sometimes. That’s why I thought I would add some of my favorite sites so that you can get right down to business without all of the searching.
This Week in Photo (TWIP)
This Week in Photo is one of my favorite sites and there is so much great information. They curate all of the latest news from the world of photography and have several different shows. My favorite show is The Fix.
These guys also put together the Alpha Mirrorless Podcast that I had mentioned above.
James Brandon
James does a great job on his tutorials and always has great info in his posts. I highly recommend that you sign up for his email newletter because, first of all, the emails are great, but you also get access to his free tutorial library.
David duChemin
David’s site is always a pleasure to read and he is as much a writer as he is a photographer and seems to have mastered both skills. David focuses more on the artistic and vision side of photography rather than the tools and hard skills of taking a photo. Because of this, everything that he focuses on and teaches is far deeper than just the fundamental skills of taking a good photograph.
You can also find David at craft and vision.
Phlearn
For detailed and informative tutorials on photoshop, one of the best places to go is Phlearn. You’ll also find some good humour along the way as the tutorials are always well-done and entertaining.
Stuck in Customs (Trey Ratcliff)
Trey Ratcliff is responsible for the site Stuck in Customs and on his blog, he posts a new photo each and every day. He’s always a great inspiration, and his easy-going and light-hearted way of approaching photography is always refreshing and inspiring.
Dan Carr
Dan has a great story about how he came to become a photographer and I’ve always been inspired by the things that he puts out. His thoughts and teachings on SEO for your website are fantastic and I mentioned his great e-book above.